

Jul
Balustrade, Past projects
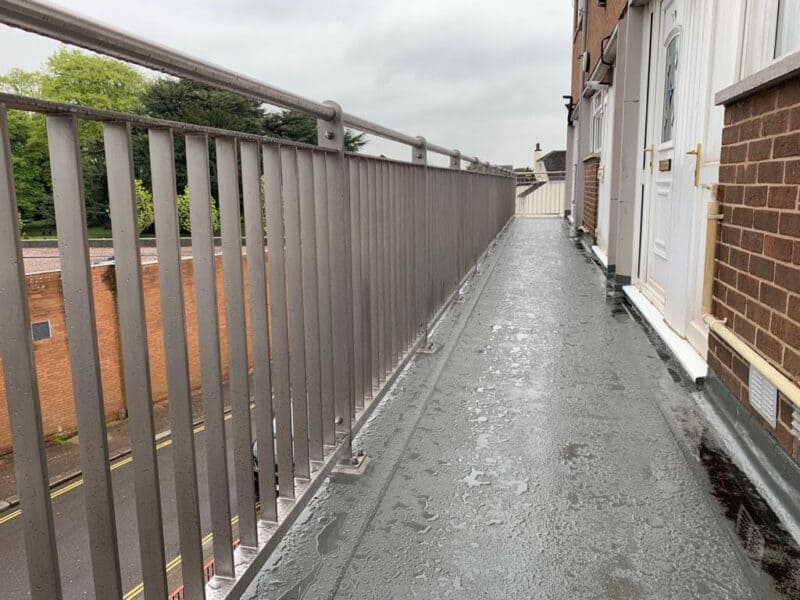
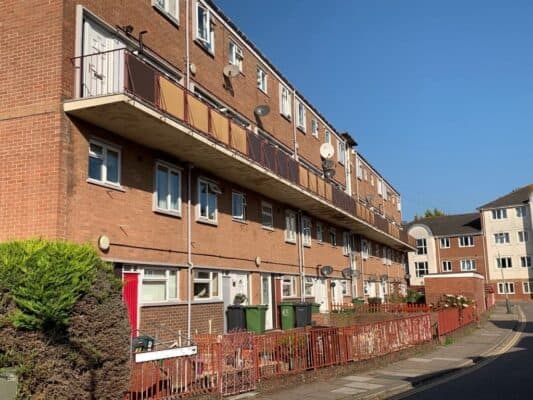
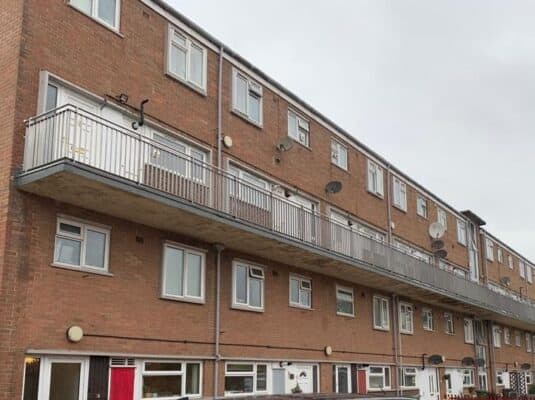
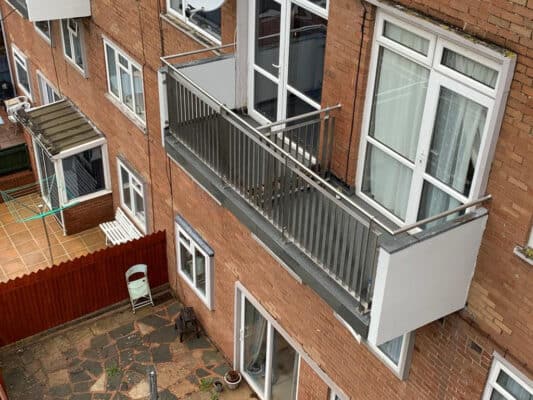
120m of Smart Stainless Steel Balustrade, Exeter City Council
The customer requirements
We were contracted by CLC Group to replace existing balustrading on some local authority owned properties for their client Exeter City Council. The existing balustrading was in a painted metal with some composite panelling which required ongoing maintenance.
The requirements for the new balustrading were:
1) To be constructed to the standards set out in the Regulations. As the works were refurbishment they didn’t have to comply with the Building Regulations, but the clients requirement was that they would be constructed to these standards. For balustrades guarding landing areas and balconies the barrier should be a minimum of 1100mm above Finished Floor Level (FFL). Gaps between infill bars should be less than 100mm.
2) Must be low maintenance, or maintenance free, and so cost effective over the long term.
3) The total length of balustrading required was 120m.
4) The design of the new balustrading was specified by Peter Judd (Exeter City Council) and approved through consultation with Scott Davies at Maurice Parker Structural Engineers.
Existing metal balustrade
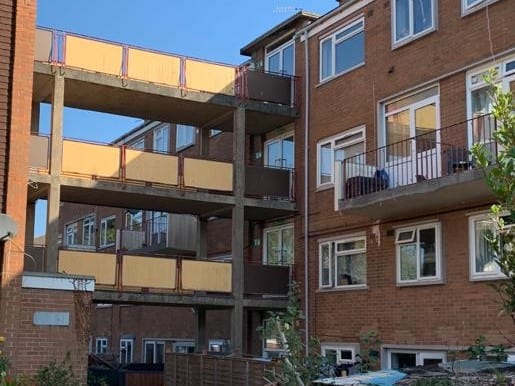
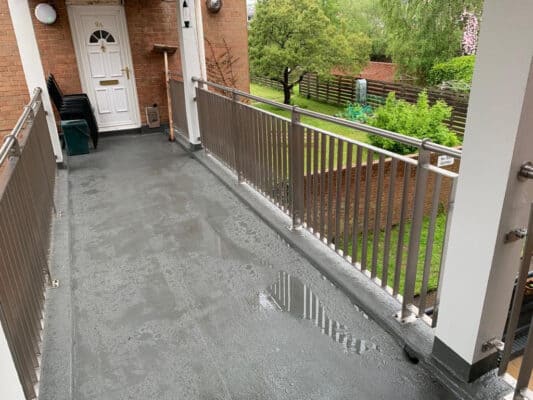
Material choice: Stainless Steel
The material of choice for this balustrade, given the requirement to be cost effective over the long term, is stainless steel. Stainless steel has a high resistance to corrosion, is easily cleaned and sanitised, is very strong and provides a modern and attractive aesthetic. The raw material and equipment to work with stainless steel is more expensive than mild steel, but, because the material is more durable, it is a cost-effective option for customers looking to invest in the long term.
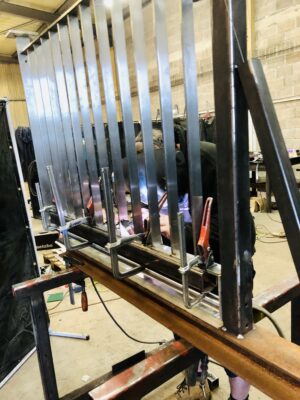
The Fabrication Process
The job involved 6 weeks of fabrication for the workshop team. For decorative stainless steel works we use TIG welding (Tungsten Inert Gas). The process uses electricity to heat tungsten to such a temperature that it melts the substrate (in this case stainless steel) and we then use a filler material (again in this case stainless) to create the weld. This creates a much neater weld than MIG (Metal Inert Gas) welding, but it is more time consuming. Each panel is made of 50x10mm flat bottom and top rail 40x10mm flat vertical infill bars, 75x12mm flat standards 42x2mm tubular handrail.
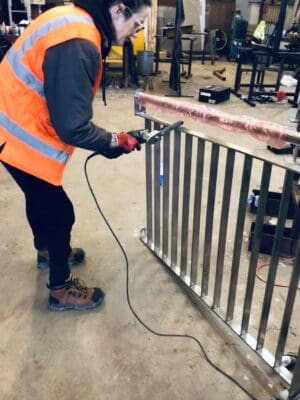
After all of the parts are welded into place we passivate the weld. This involves cleaning up the weld to take away the heat discolouration and restoring the protective oxide layer. There are various methods that are used to passivate welds, some involving dangerous and complicated chemicals. We employ a relatively new technique that avoids the dangerous chemicals “electrolytic weld cleaning”. Details on the benefits of this method, using a TIG brush are given here.
The next quality control step in the workshop is to take off any sharp edges to the steel and polish the balustrade to ensure that has a clean and flawless finish before being wrapped and transported to site.
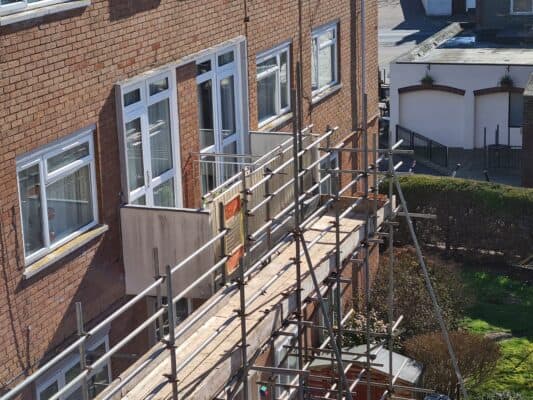
Installation
CLC arranged for the site to be made safe with scaffold, erected by Nexus Scaffolding. Our team carefully removed the old balustrading and sent it to be recycled with EMR (European Metal Recycling).
Installation of the new stainless steel balustrading then took place over several weeks. Our site supervisor Niki Shaw led the job, working together with Rob from CLC to ensure that the installation went ahead smoothly with minimal disturbance to the local residents.
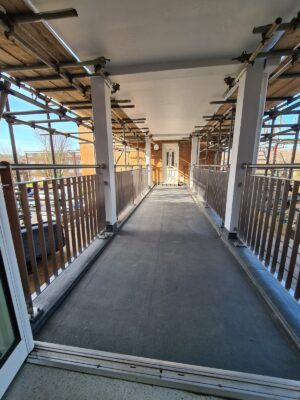
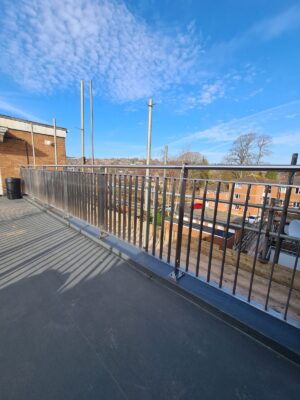
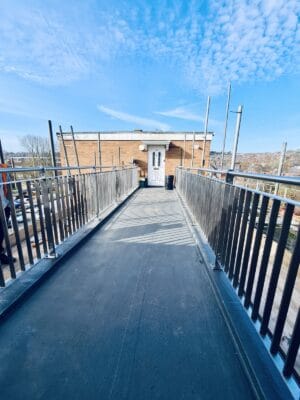
Finishing
To ensure the site was clean and tidy when we left we sub contracted in a local cleaning firm Moore and Franks to wash down the balustrading and walkways. Despite the in house polishing and fantastic cleaning job by Moore and Franks we found that the specialist stainless steel polish that we had invested in had left a white residue on the balustrade after rain. After a bit of in house testing we found that the best method to remove this residue was with a bit of elbow grease and a scotch brite pad. It was necessary to do this by hand to ensure that the final polishing was conducted with the grain of the stainless steel. So the final step involved a large team rubbing down every surface of the railings on-site, a time consuming but satisfying process. The scaffolding was later removed and Jack the Managing Director returned to take some photos. We were lucky with the weather for the installation process but sadly the day Jack returned the clouds and rain came so the pictures do not do the works justice here. It is amazing what a bit of blue sky and light can do to show off stainless steel. We will hope to return to site for some sunny photos soon, but for now, here is the finished work.


Final thoughts
We have completed several projects in Exeter, from stainless steel balustrading for a commercial customer to architectural and structural metal work for a private client as we described here. The diversity of skills within our team is such that we are able to tackle any steel project requirements. We would like to thank Niki for his exceptional leadership skills on this job, which were complimented by the site supervisor Rob from CLC. The workshop and site teams put a huge amount of time and effort into this project. Also thanks to CLC and Exeter City Council for your custom. It is fantastic that large organisations support small local businesses like ours where possible and it was a pleasure working with you.